Painting trim is easy.
Painting it well? Well, that can be a little more tricky. But if you want to spruce up your rooms this spring, there’s no need to shell out big bucks for a professional painter. With a little care and patience, you can get a pro-style paint job on a DIY budget.
Before you start, gather the following supplies:
• Sandpaper
• Spackling compound and/or wood filler
• Flexible putty knife
• Frost King weatherstripping
• Caulk
• Rags or sponges
• Painter’s tape
• Drop cloths
• Primer
• Paint
• Bucket
• Angled brush
Pro tip: If you’re painting the entire room, paint the trim before you paint the walls—you’ll end up with cleaner lines and a more polished-looking room.
Before you get started, follow our tips for a job well done.
1. Great results require careful prep work. The first step is to go over all trim with sandpaper to rough up the surface. Use 120-grit if your trim is in good shape. If it’s chipped or dinged up, you’ll need to smooth all the rough spots. Start with 80-grit sandpaper, then smooth and blend the areas with 100-grit sandpaper, and finish with 120-grit. (Note: If your home was built before 1979, check for lead paint before you start to sand. Call your local public health department to learn how to properly test for lead paint.) Fill any holes or dents with wood filler or spackling compound. Let it dry, and then sand until smooth.
As you are sanding trim around doors and windows, look for any gaps around doors and windows and seal them up with Frost King weatherstripping. This extra step will pay off in energy savings all year long. Watch this video to learn how to seal doors:
and this video to learn how to add weatherstripping around windows:
Use caulk to fill gaps between the trim and the wall.
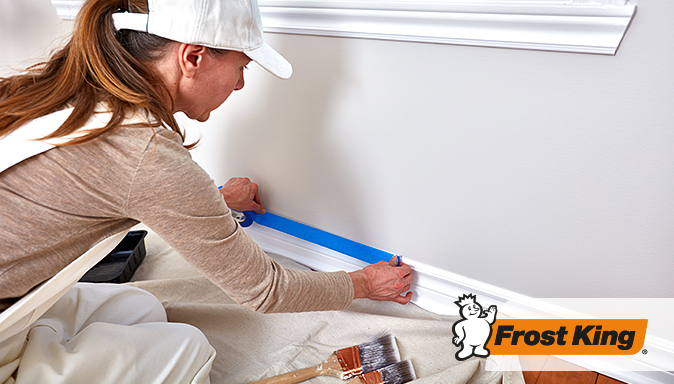
2. Once you’ve finished sanding, caulking, and adding weatherstripping, carefully wipe any dust from the trim surfaces with a lint-free rag or damp sponge, and then apply painter’s tape to the edges for a crisp, clean paint line. Run your finger over the edge of the tape to seal it and remove any air bubbles. If you’re painting baseboards in a carpeted room, you can try to remove the carpet’s tack strip and pull the carpet away from the trim so you can paint right down to the floor or you can use a carpet shield to protect the carpet while you are painting.
3. Lay down drop cloths to catch paint spray or splatters. Brush a stain-sealing primer over any patched or bare areas to help the trim paint adhere. Let the primer dry thoroughly, then prime all the trim.
4. It’s finally time to start painting! Most people find it’s easier to pour paint into a smaller bucket rather than using paint directly from the can. Using an angled brush, cut in the edges and then, working with small sections at a time, apply paint to the trim with short strokes, then smooth the paint with one long stroke. To avoid brushmarks, always start in an unpainted area and brush towards a painted area, and work quickly so the paint does not have time to dry. Work your way around the room, painting small sections at a time, until all the trim is painted. In most cases, you’ll have to apply two coats for a smooth, durable finish. Let the first coat dry thoroughly before painting a second coat.
When painting a surface with a sharp edge, such as the top of a door frame, avoid brushing across the edge, which can result in paint drips. Instead, brush toward edges or along them. If paint drips, wipe it up immediately with a dry brush, a rag, or your finger.
5. Once the paint is dry, remove the painter’s tape by slowly and carefully pulling it away at a 45-degree angle. Then step back and admire a job well done!