For most of the country this winter was brutal, with lots of time stuck indoors. As winter finally gives way to spring, our homes could use a good floor-to-ceiling spring clean that gets rooms ready for a whole new season.
You already know the basics—wash windows, floors, and walls, dust woodwork, scrub bathrooms. But there are some corners of the house that most homeowners just don’t think about. Add these projects to your deep cleaning to-do list and enjoy a sparkling clean home all spring (and summer!) long.
Mattresses
You use it every day—but have you ever cleaned it? It’s time to go beyond washing sheets and bedding, and give your mattress a deep clean, too. To start, remove all the bedding and wash it in the hottest water possible. While sheets are spinning, vacuum the top and sides of the mattress (use an upholstery attachment if you’ve got it) to pick up dust, dust mites, allergens, and other yucky things that might be lurking in the fabric. Sprinkle the mattress with a layer of baking soda and let it sit for at least 30 minutes before vacuuming again. Before putting clean bedding back on the bed, wipe down the bed frame with a damp cloth.
Some newer mattresses are one-sided, but if you have a standard mattress this is a good time to flip and rotate it so it wears evenly. While you’re at it, wash your pillows! Most pillows can be machined washed on the gentle cycle, and then dried on moderate heat (use the air dry setting for down pillows). Toss a few tennis balls into the dryer with the pillows to fluff them up and keep the filling from clumping.
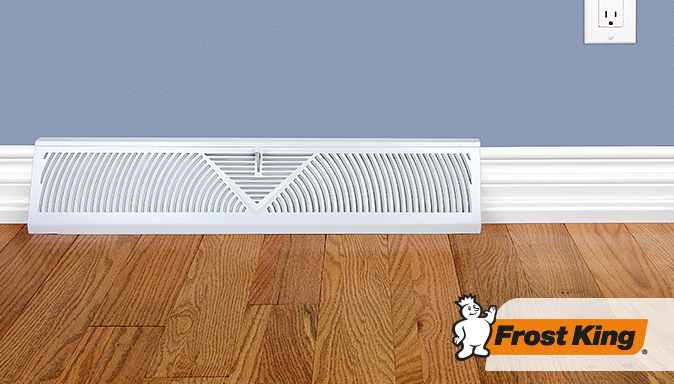
Air Vents and Floor Registers
Dust, pet fur, and other gunk can get caught in your HVAC system’s air vents and then blow all over your house. Cleaning all that dirt away can help you and your family breathe easy—and it’s easy to do. To start, turn off the HVAC system, then remove the vent covers and let them soak in hot, soapy water for 15 minutes. Use a soft bristled brush to gently scrub away any grime that remains on the covers and rinse thoroughly. While the vent covers are drying, vacuum up dirt, dust and cobwebs from the duct openings then replace the covers. As you are replacing the covers, you may want to install our Heat & Air Deflectors to improve the efficiency of air distribution in your home and make rooms more comfortable in all seasons. In summer, point the deflector up to drive cool air towards the ceiling; in the winter, point the deflector down to direct air towards the floor.
Filters
Give all the filters in your home a good spring cleaning! Filters keep appliances running smoothly, but if they’re filled with gunk they can’t do their job.
Start with the dishwasher. If your dishwasher has a manual filter, pop it out and rinse it under hot water, then gently scrub the screen and crevices to get rid of any food particles or other gross stuff that’s left behind.
Next, tackle filters on the range hood or over-the-stove microwave. Pull out the filters and wash them in hot, soapy water to get rid of greasy build-up. Let them thoroughly air dry before reinstalling.
You probably already know that you should clean out the lint screen on your clothes dryer every time you use it, but you should also make a point of periodically cleaning out any lint or dust that’s trapped in the slot that the lint trap slides into. Use a long, narrow vacuum tool to reach into the slot and clean it out.
Some filters can’t be cleaned but do need to be replaced regularly. Water filters, air purifiers, vacuum cleaners, and your HVAC system should be changed regularly to keep them working well.
Exterior Doors
Have months of snow and salt taken a toll on your doors? Make entryways more welcoming—and boost your curb appeal!—with a good cleaning. Start by running the nozzle attachment on your vacuum cleaner around the door trim and frame to remove accumulated debris, cobwebs, dust, and dirt. While you’re vacuuming, examine the weatherstripping around the frame. Is it torn or damaged? If so, replace it with fresh weatherstripping—watch this video for easy, step-by-step directions for installing new weatherseal.
Next, tackle the door itself. Wipe away any dirt and grime on the surface; you may need to grab your vacuum again to suck out any dirt that’s built up in crevices on the door. Fill a bucket with warm, soapy water and thoroughly wash the front and sides of the door. Rinse with warm water and dry with a soft cloth. Give hardware a quick shine for the ultimate welcome home.
Garage doors also take a beating during the winter. Grab a bucket full of warm, soapy water, a soft sponge, and a step ladder and scrub away dirt and salt caked up on the door’s surface. Scrub the trim and weatherstripping around the door, too. If it’s damaged or worn, it’s time to replace it. Frost King makes a variety of garage weatherseal products to keep dust, dirt, drafts, and water out of your garage.